- Saving Your Book
- 1. KPF Files Only
- 2. Does Not Support Footnotes, Endnotes, or Volumes and Parts
- 3. Limited Formatting Options
- 4. Large File Sizes Means Less Money For You
- 5. Limited Themes
- 6. Limited Editing Capabilities
- 7. Trouble With Images & Bullets
- 8. No Cloud Storage
This article works hand in hand with this video that I put out over on my YouTube channel. If you prefer visual mediums, allow me to walk you through Kindle Create here:
Want more videos like this? Be sure to subscribe to my YouTube channel for weekly videos!
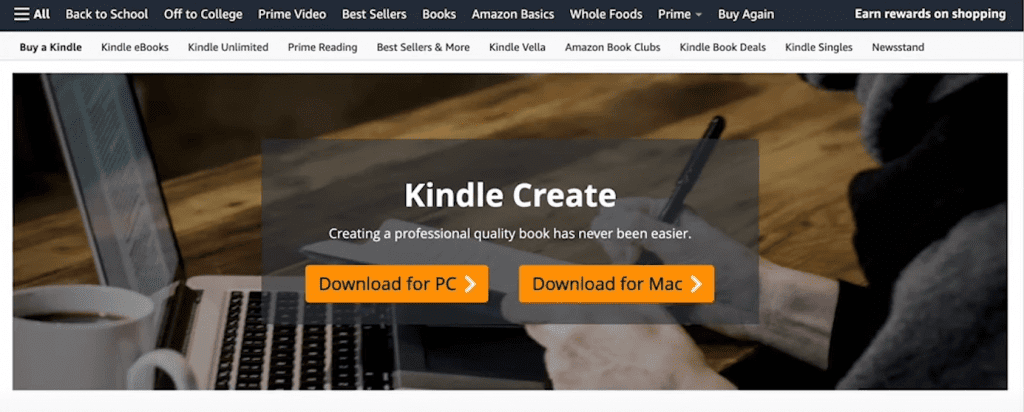
Step 1 : Download Kindle Create
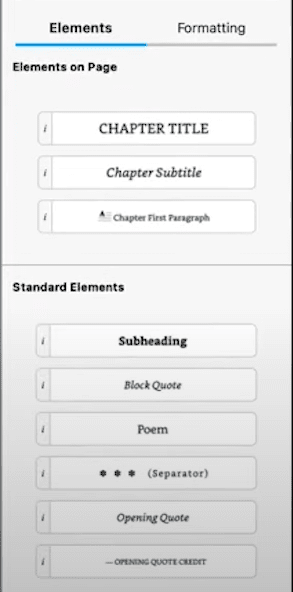
Back in the right toolbar, you’ll see two tabs under the “Current Element” section. One says “Elements” and the other says “Formatting.” By clicking on the formatting tab, you’ll bring up some basic formatting options you can use to tweak your book, if need be.
These include things like:
- Font color
- Font size
- Bold, Italics, and Underlining
- Paragraph options
- Indents
- Spacing
Since most of these things are pre-generated based on the theme you choose, you may not need to change any of them. But it’s always good to double-check and make sure before you move on.
Step 6 : Inserting Elements
With Kindle Create, you have the option to insert various elements, like images and hyperlinks. To insert an image, place your cursor where the image will go. Then locate “Insert” in the top left corner of the window. Select “Image” from the dropdown menu. You’ll then be able to search for and upload the image from your computer.
Once the image is uploaded, you’ll need to add an Alt Text description in the window in the right side toolbar. However, if you only want the image to show up in the print version of your book, you can click the box that reads “Exclude this image from the screen reader” so it won’t show up on e-readers. In this case, you don’t have to put a description in.
Below, you’ll see that you have a few different options for size and position of the image. Remember that images can cause problems in reflowable Kindle Create books. Use the “Preview” option at the top right corner of the window to check and make sure your image looks good on the page.
To insert a hyperlink, simply highlight the text you want to link. On a Mac, control-click. On a PC, simply right click to bring up the “Insert Hyperlink” option. Click on that option and then insert the link, making sure to include the https:// portion.
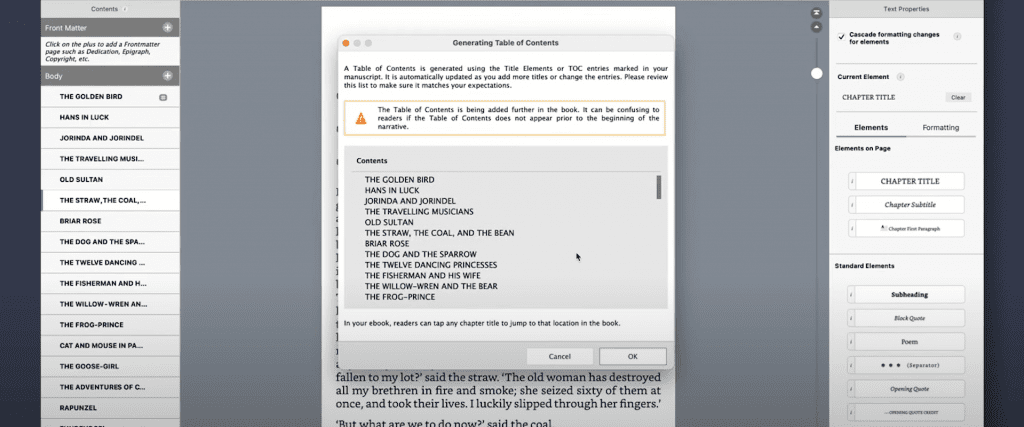
Step 7 : Adding Your Table of Contents and Saving Your Book
Saving Your Book
At this point, it’s a good idea to save your work. In the top right corner, there’s a “Save” button. Click on it, select a folder on your computer, enter the name of the file, and click save. You’ll need to save your work before you can export it to KDP for publishing.
Step 8 : Preparing Your Print Book (Optional)
Kindle Create is nice because it allows you to create a print-ready file without going through all the steps above again. You can simply generate a print file from the work you’ve already done to this point.
Find and select the “Print Settings” button in the top right corner of the window. This will bring up a window with options for the layout of your print book. Select one that you like and hit “OK.”
If you aren’t planning on doing a print book, you can skip this step.
Step 9 : Preview Your Work
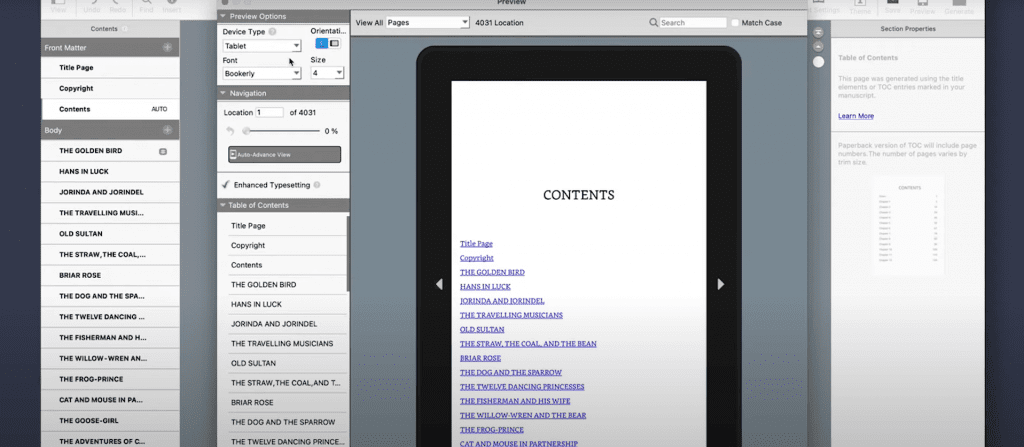
ebook and/or print book, it’s good to preview your work. Click the preview button in the top right corner. A window will come up with options to preview how your book will look in three different formats.
In the top left of the pop-up window, you’ll see a “Device Type” option. Using the dropdown menu, you can select to view your book on a tablet, a phone, and a Kindle e-reader. There are many more devices out there, but these three can give you a good idea of what your book will look like.
If everything looks good, it’s time to generate your file!
Step 10 : Generate Your Book File
While the books Kindle Create generates are pretty basic, they are adequate for those on a budget or new authors who are itching to get their first book out into the world.
However, there are some pros and cons to consider if you’re thinking about using this software.
Kindle Create Limitations
Now that we’ve gone through formatting your book with Kindle Create, let’s take a look at some of its limitations. While Kindle Create is a good option for those on a shoestring budget, it is severely limited in several aspects.
1. KPF Files Only
If you’re “going wide” as an author — which means selling your books on stores other than Amazon — you won’t be able to use the book files generated in Kindle Create. This is because they’re KPF files, which can only be used on Kindle Direct Publishing.
This is another way that Amazon “encourages” you to stay exclusive to their platform. And while Amazon does have a massive audience, there’s an argument to be made for reaching all those people who buy books from Apple, Google, Kobo, and dozens of other online retailers.
So if you want to publish your book with Amazon and those other stores, you’ll have to format your books in another program. Instead of doubling your work, you can use a program like Atticus that will give you EPUB and print-ready PDF files for publishing with all major stores.
2. Does Not Support Footnotes, Endnotes, or Volumes and Parts
If you’re writing fiction, you probably don’t need footnotes and endnotes. But if you’re writing nonfiction, you just may need them. Unfortunately, Kindle Create doesn’t support them. The same goes for volumes and parts.
If you’re writing in series and you want to create an ebook box set file, you can’t do so with Kindle Create. You’ll need to seek out formatting software like Atticus to create your box set!
3. Limited Formatting Options
With Amazon’s free formatting software, you’re severely limited when it comes to things like font, page separators/organic breaks, and margins. Your font selections are limited to a few options. With page separators and organic breaks, you can’t customize them to your liking. And you can’t adjust margins on your print book file.
Essentially, if you don’t like what Amazon offers, you’ll either have to stick with formatting you don’t like or seek out another formatting tool.
4. Large File Sizes Means Less Money For You
Another limitation with Kindle Create is file size. When we compared the file size of a book formatted by Kindle Create to that same book formatted by Atticus, we found that Amazon’s tool created a much larger file. The Atticus file was 2.25 times smaller than the Kindle Create file.
This is important because Amazon charges a “delivery” fee of $0.15 per megabyte (MB) on every purchase/download. So when considering these two file sizes, Atticus formatting software would pay for itself in only 800 book sales.
5. Limited Themes
As mentioned above, Kindle Create only has four total themes you can use for your book. And you can’t create your own custom theme. With Atticus, you have over a dozen themes to choose from — and it allows you to build your own custom themes.
While on the subject of themes, it’s important to note that KC only has three preview options. This means you can only see how your book looks on a phone, a tablet, and a generic Kindle. Conversely, Atticus has far more preview options, including Android tablets, Apple products, print, Kobo readers, and Nook readers.
6. Limited Editing Capabilities
It’s fairly common to find mistakes in your book, even during formatting. Using a professional editor and proofreader will help ensure limited mistakes, but they probably won’t catch everything. And if you’re formatting with Kindle Create, you’ll have a hard time fixing any errors you see.
KC doesn’t have a find & replace feature. It also doesn’t have a spell check function. And if you’re wondering how many words are in a chapter (or the whole book), you’ll have to go back to your manuscript to find out.
If you have to make any major changes to your manuscript, you’ll have to start over from scratch when using Kindle Create. But if you’re using Atticus, you’ll be able to fix issues in minutes instead of hours.
7. Trouble With Images & Bullets
As mentioned above, images can be a little tricky on Kindle Create. If there’s a space at the bottom of the image, it can sometimes move that image to the next page, meaning your image won’t show up where you want it to. KC also doesn’t support full-bleed images for print books.
If you have bullet points or lists in your book, you’ll have to copy them in and mess with the spacing until you have them where you want them. Atticus, however, makes image insertion easy. It also supports automatic lists and bullet points.
8. No Cloud Storage
Kindle Create doesn’t provide cloud storage or backup. This means any files you create will be stored on your computer. It will be up to you to save a copy to the cloud so you don’t lose it if something happens to your computer.
You can probably guess what I’m going to say here . . . Yes, Atticus provides automatic cloud storage backups. You can also save your work locally, as well.
Kindle Create Works, Atticus Excels

book writing a lucrative hobby or a full-time career, you’re better off starting with a professional-grade tool from the get-go. With Atticus, which is available for a one-time fee, you aren’t limited to just Amazon. You can branch out and reach readers in other markets. Plus, with smaller file sizes, you’ll see more money coming to your bank account as your sales increase, helping the software pay for itself.
With a smooth interface, customization options, word count goal tracking, editing capabilities (including ProWritingAid integration), and timesaving features, Atticus.io can make formatting a breeze.
Dave Chesson
When I am not fighting dragons or chasing the bogey man out of my kids' closet, I like using my previous Online Optimization skills to help other authors with the 'technical' stuff and get the right authors to the top of Amazon and any other eBook service out there.
Posted in Book Formatting Tagged Formatting
Hi, I'm Dave Chesson
When I’m not sipping tea with princesses or lightsaber dueling with little Jedi, I’m a book marketing nut. Having consulted multiple publishing companies and NYT best-selling authors, I created Kindlepreneur to help authors sell more books. I’ve even been called “The Kindlepreneur” by Amazon publicly, and I’m here to help you with your author journey.
“Gain insight from Kindlepreneur on how you can optimize marketing for your books."Table of contents
- Step 1: Download Kindle Create
- Step 2: Start Your Document
- Step 3: Check the Contents
- Step 4: Choose a Theme
- Step 5: Formatting Tweaks (If Necessary)
- Step 6: Inserting Elements
- Step 7: Adding Your Table of Contents and Saving Your Book
- Saving Your Book
- 1. KPF Files Only
- 2. Does Not Support Footnotes, Endnotes, or Volumes and Parts
- 3. Limited Formatting Options
- 4. Large File Sizes Means Less Money For You
- 5. Limited Themes
- 6. Limited Editing Capabilities
- 7. Trouble With Images & Bullets
- 8. No Cloud Storage
